
Segger documentation: Segmenting a density map
- Opening and visualizing a density map
As an example, the density map of GroEL at 10.0Å resolution (EMD:1080), from the EMDB, will be used. This map can be downloaded from this link. It can be opened in Chimera by selecting File->Open.... Once open, the density map will appear in the main Chimera window:
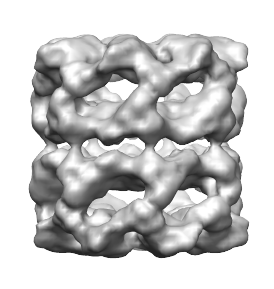
The Volume Viewer interface will also appear as a result:
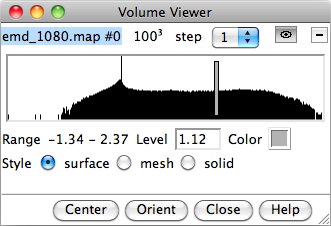
The Volume Viewer interface can also be opened from Tools->Volume Data->Volume Viewer. It shows, amongst other information, a histrogram of the density values. The gray bar can be dragged left or right to change the threshold, which is the density value used to generate the iso-surface shown in the main window. At higher thresholds, the inner and denser regions are seen, and at lower thresholds, the outer surface of the molecular complex is seen.
- Opening the Segger interface
- Segmenting the map
- Editing the segmentation
- Saving segmentation results
- Restarting
The Segger interface can be opened by selecting Tools->Volume Data->Segger.
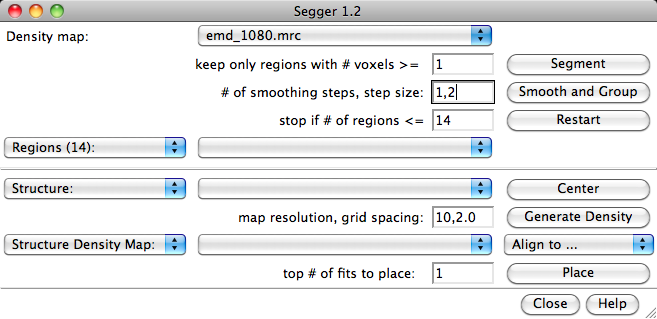
To segment the map, first make sure the map to be segmented is selected in the field to the right of the label 'Density map' in the Segger interface. This field is a drop-down menu, showing all the density maps currently open. The threshold selected for the density map in the Volume Viewer interface will be used in the segmentation process. Once the desired threshold is selected, click the Segment button.
Side Note: The external segmentation program used by this process only knows how to properly read .mrc files, so if the map is not in one of these formats, first save it in the .mrc format by choosing "File->Save map as" from the Volume Viewer menu, and selecting MRC for the file type. If the segmentation does not appear after pressing Segment, it is most likely because the map was not successfully read because of a different format, or was not found.
3.1 Result of segmentation: _regions files
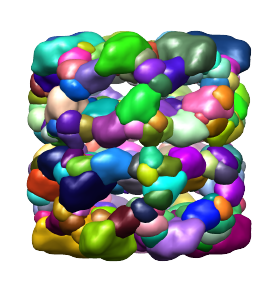
The results of the segmentation process are regions, with each region containing a number of adjacent (26-connected) voxels. Each region is shown as a smooth surface sourrounding the voxels it contains. The regions are written to a file, emd_1080_D1.120_regions, which conists of the name of the map, emd_10180, the threshold, D1.120, and the suffix _regions. This file is saved in the folder where the density map is located. After the segmentation process finishes, the resulting _regions file is loaded, and all the regions in it are displayed using surfaces as described above.
When loading regions from a _regions file, regions are filtered by size. This can be used to remove any regions that are very small and would be due to noise. Regions that consist of fewer voxels than the number entered in the field to the right of "keep only regions with #voxels >" are ignored completely.
The name of the currently loaded and shown _regions file also appears in the field to the right of the Regions button. This field, where this name appears, is also a drop-down menu, which when clicked, will show all the open _regions files, as well as any other _regions files in the folder where the density map is located. Any of these entries can be selected, and the regions in that file will as a result be shown in the main Chimera window (while all other open _regions files will be hidden).
The segmentation resulting for the GroEL map is shown below.
3.2 Scale-space filtering and grouping of regions
While the segmentation shown above is interesting, it's not necessarily useful, since there are many more regions than proteins: there are only 14 proteins in GroEL. This is often called oversegmentation.To get a more useful segmentation, we will smooth the map, and then group the regions based on this smoothed map. In the field to the right of "# of smoothing steps, step size", enter 1,2, which specifies a single smoothing step of size 2Å. The step size is the standard deviation of the Gaussian kernel which will be applied to smooth the map. Then press the Group Regions button.
The map is first smoothed, so a new density map is produced, which is named emd_1080_gs2.mrc. The name is based on the original name of the map, emd_1080, and a suffix gs2, which indicates the amount of smoothing. This smoothed map is hidden by default (not shown in the main Chimera window), but it will appear in both the Volume Viewer and Model Panel dialogs, where it can be unhidden if desired.
The smoothed map and the newly grouped regions will look as follows:
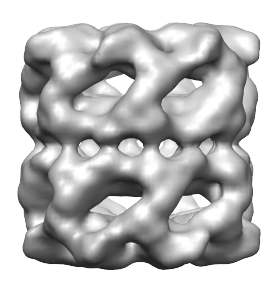
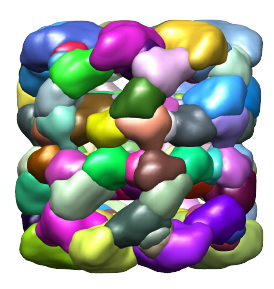
In the new segmentation results, there are fewer regions, and they are larger. The next time the Group Regions button is pressed, the smoothed map is further smoothed by the entered step size, and its name will change to reflect the total amount of smoothing (_gs4). Because the smoothing is performed using a Gaussian kernel, it is guaranteed to not introduce any new (artifical) extrema; instead it will result in extrema merging, and thus the number of regions will decrease.
To group regions with multiple steps, a number larger than 1, followed by comma, and the smoothing step size can be entered in the field to the right of "# of smoothing steps, step size:". Grouping stops after the specified number of steps are taken, or when the number of regions is less than or equal to the number entered in the field to the right of "stop if # of regions <=".
In this example, we entered 100,2 for "# of smoothing steps, step size", and pressed Group Regions. After 52 more smoothing steps, the number of regions reaches 14, and each region corresponds to an individual protein, and the process stops. These regions are shown below.
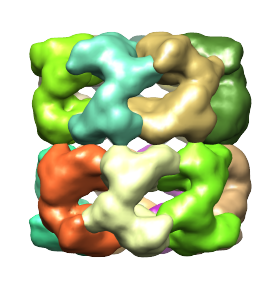
Side note: The grouping process described above does not always, as in this case, produce single regions for every protein. When grouping has been taken too far, and if fewer regions are desired, the regions can be ungrouped by selecting Regions->Ungroup ALL. After un-grouping regions up to apoint where more regions are obtained than the number of proteins, regions can then be grouped manually as desired, as described below in the section Editing the segmentation.
Side note: The step size of 2.0Å is picked somewhat arbitrarily. It produces a small amount of smoothing, so the changes to the number of regions is gradual. A larger step size can also be used, which typically results in larger drops in the number of regions from step to step. Larger steps may be prefered when the map is large, since smoothing can take a longer time for larger maps, and thus taking many steps would require even more time. Large steps can also produce better results when the map is very noisy, because smoothing suppresses noise.
3.3 Selecting and working with regions
On the Regions button in the Segger interface, a number appears in brackets (e.g. 428 after segmenting emd_1080.mrc, or 14 after grouping the regions as described above). This is the number of regions in the currently shown _regions file (not the number of regions actually shown - regions can be shown or hidden). This button is also a drop-down menu, which contains operations that can be applied to all or selected regions.
A region can be selected using the usual Chimera selection mechanism. For example, while holding Ctrl, clicking on a region selects it (you will see a greenish border around it), or unselects it if it is already selected.
Multiple regions can also be selected; clicking on a region while holding Shift+Ctrl adds it to the current selection if it isn't already in the selection, or removes it from the selection if it is in the selection already.
Depending on the operation, selected regions can be hidden, deleted, grouped, ungrouped, etc. by selecting the corresponding operation from the Regions drop-down menu. Other operations allow you to invert the selection, or operate on all regions.
Once regions have been grouped, they can be split up into smaller regions by selecting a region, and then choosing Regions->Ungroup selected. When a region is ungrouped, it is replaced by the regions that were combined to create it during the grouping process. The ungrouping step can be repeated for any of the resulting smaller regions.
Conversely, any number of regions can be combined into one region by selecting them together, and then selecting Regions->Group selected.
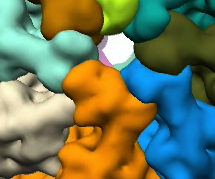
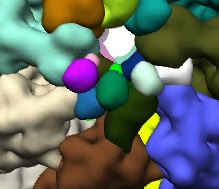
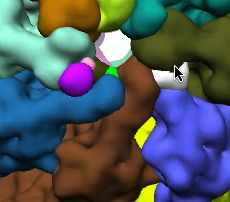
Ungrouping and grouping operations are illustrated in the images below. The image on the right shows the segmented regions. The image in the middle shows the regions after some of the large regions were subidvided. The image on the right shows images regrouped into large regions again, but with small local modifications.
 _
_
 _
_
Grouped and editted regions can be saved to a new _regions file by selecting Regions->Save as _regions. When saving a new _regions file, the same name of the original file is used, adding a _save_# to the end, where # is a number that starts at 1 and is incremented with each save. This file can be opened later by first opening the same density map in chimera, selecting this density map in the drop-down menu to the right of "Density map" in the Segger interface, and then selecting this regions file from the drop-down menu to the right of the Regions button.
One or more regions can be used as a mask for the density map, and the masked density map saved to an individual .mrc file. This can be done by selecting one or more regions, and then choosing Regions->Save selected to .mrc file. Regions->Mask map with selected does the same thing, but a file is not saved. Regions->Save each to .mrc file saves a masked map for each region in the same directory as the density map. For all these operations, the masked maps also remain open and will be accessible in the Volume Viewer and Model Panel.
The Model Panel, which can be opened from Tools->General Controls, is extremely useful in general for keeping an eye on all the open models, and allows showing and hiding of each model.
After segmentation and grouping of regions is performed, intermediate files can be closed and deleted by pressing the Restart button. This closes the smoothed map; it also closes and deletes all _regions files in the same folder as the density map, except any _regions_save_# files which were saved by selecting Regions->Save _regions file.
Please contact Greg Pintilie by email with comments and suggestions.


 Home
Home